How to create a new knowledge base?
You can create a single knowledge base instance or multiple knowledge bases according to your business requirements. To create a new knowlege base, open the IncredibleDocs main menu and select the "Knowledge Bases" sub-menu.

The admin screen is divided into two main sections. On the right side, we will see a list of configured knowledge bases and on the left side a list of form fields that can be used to create a new knowledge base.
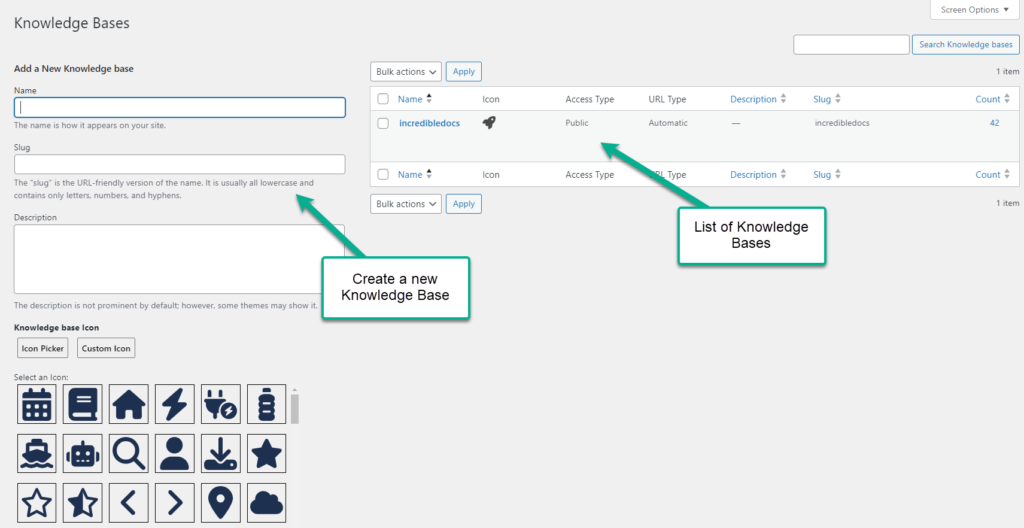
When creating a new knowledge base, the following fields are available:
- Name - type the name of the new knowledge base (e.g. Documentation KB, Products, Docs). This name will be used internally as part of the backend admin area to select the knowledge base and perform additional customization (e.g., changing the design settings, and access control) or view analytics data.
- Slug - is the unique identification of the knowledge base resource inside the URL. If you don't type anything, it will be generated automatically using the "Name". Keep in mind, that if you are planning to create multiple knowledge bases, each one must have a unique slug.
- Description - is an optional internal test information that describes the knowledge base main function (e.g., content type, products list)
- Knowledge base Icon - that's an optional selection. The icon will be used in the main knowledge base view to articulate in a visual way the purpose of that knowledge base. You can select a pre-defined icon using the "Icon Picker" or to use the "Custom Icon" from your website files.
Finally, click "Add a new Knowledge base" and it will added to the list on the right side.
How to access a knowledge base link?
You can access the knowledge base frontend view by clicking on "View":

A new knowledge base has the following default configuration:
- "Public" Access Type - meaning, there is no content restriction and anyone can visit the knowledge base content. The Pro version is adding a dedicated "Access Control" setting to adjust the access type.
- "Automatic" URL - the plugin automatically allocates a URL to the main knowledge base view and in that case, there is no need to use a dedicated WordPress page with a shortcode to visualize the knowledge base. The URL of the new knowledge base can be seen and accessed from the "View" link when hovering on the knowledge base name. The URL settings can be adjusted from the "Settings" menu.
How to edit a knowledge base?
Open the Knowledge Bases admin page and click "Edit" on the relevant knowledge base instance.

Inside the "Edit Knowledge Base" screen, you can adjust the following knowledge base configuration:
- Name
- Slug
- Description
- Knowledge Base Icon

Finally, click "Update".
How to delete a knowledge base?
Please note - Deleting a knowledge base instance is an action that cannot be undone.
Open the Knowledge Bases admin page and click "Delete" on the relevant knowledge base instance.
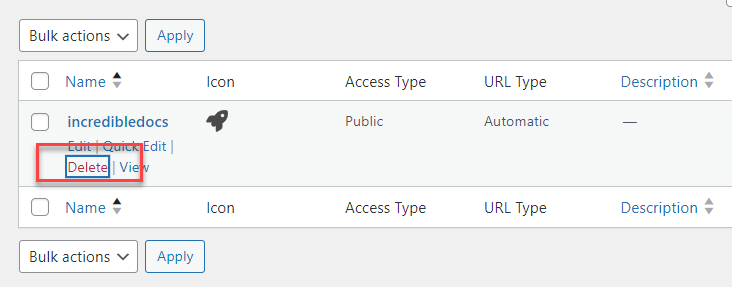
Please carefully read the warning screen:
- All Knowledge base custom design settings, analytics data, and visitors' feedback will be removed.
- Categories, FAQ Groups, and content items attached to the knowledge base will not be removed.
Finally, confirm or cancel this operation in the next step.