Welcome! How can we help you?
Find setup guides, tutorials, troubleshooting, videos and more.
Access Type
A new knowledge base instance will have a default “Public” access type value. It means there is no content restriction and any non-registered visitor will be able to access all content items.
As part of the features coming with the IncredibleDocs Pro version, you can adjust the access type for any knowledge base. Go to “Settings” –> “Access Control” –> “Knowledge Bases” and adjust the access type for the relevant knowledge base instance.
If you are planning to restrict all content to only registred users then select “Internal”. If part of the content should be accessed by non-registered users, then select “Hybrid”.
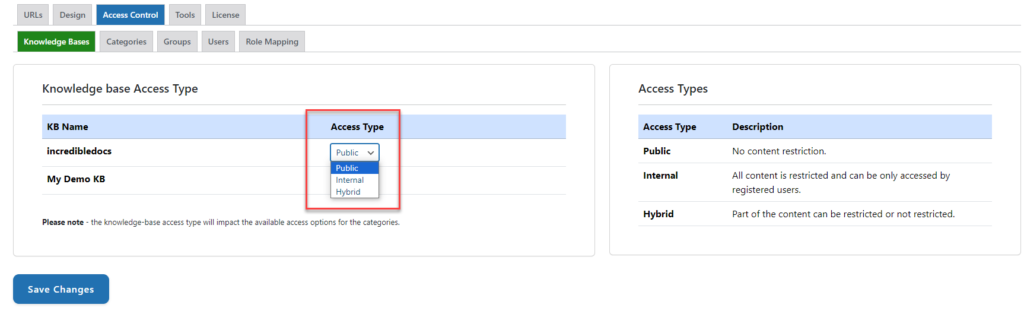
After adjusting the access type, click “Save Changes“. If the selected access type is “Internal” or “Hybrid” then the next step will be to adjust the access type for each top-level categories.
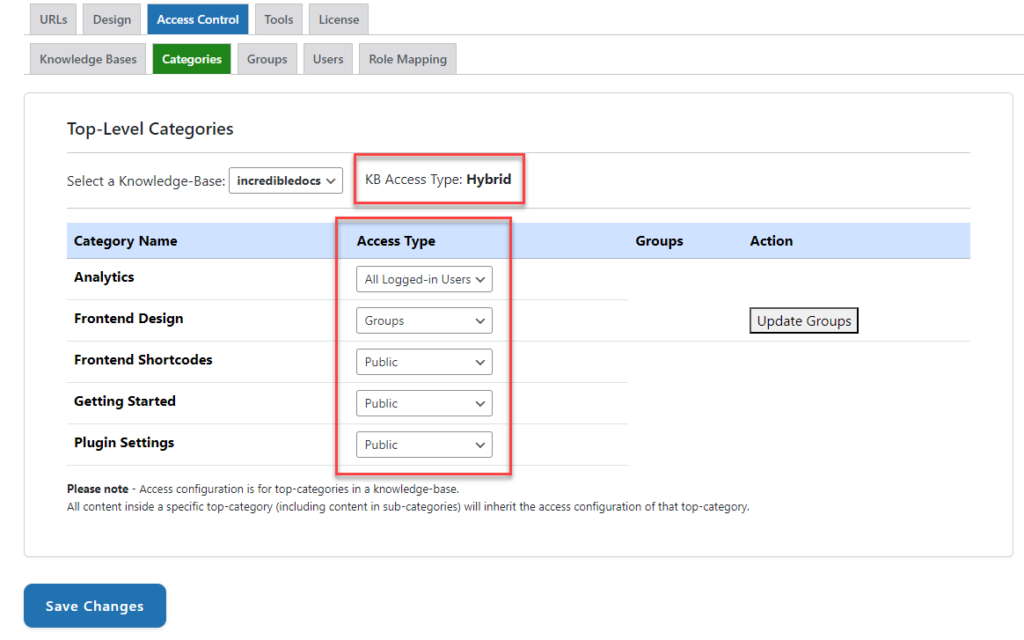
After adjustung the access type for a specific knowledge base, the next will be to configure the access type for each top-level category in that knowledge base. All content items and sub-categories attached to a specific top-level category, will inherit the configured access type of that category.
Go to “Settings” –> “Access Control” –> “Categories” and adjust the access type for each category:
> Public
> All Logged-in Users
> Groups
After adjusting the access type for top-level category, click “Save Changes“.
Groups and Users
An access group can be used to restrict the access for a specific category to only a group of users. You can create one or multiple access groups, assign users to those groups and finally attach the groups to the relevant top-level categories.
Go to “Settings” –> “Access Control” –> “Groups”. Type the name of the new group and click “Add”. The number of assigned users will be zero for the new added group until you will attach users to the new group.

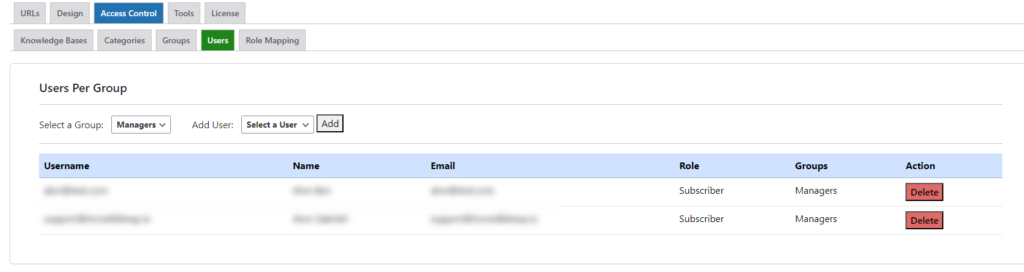
Go to “Settings” –> “Access Control” –> “Users”.
First select the relevant access group from the drop-down selection option. It will update the list of users attached to the selected group. You can add or remove users from that group.
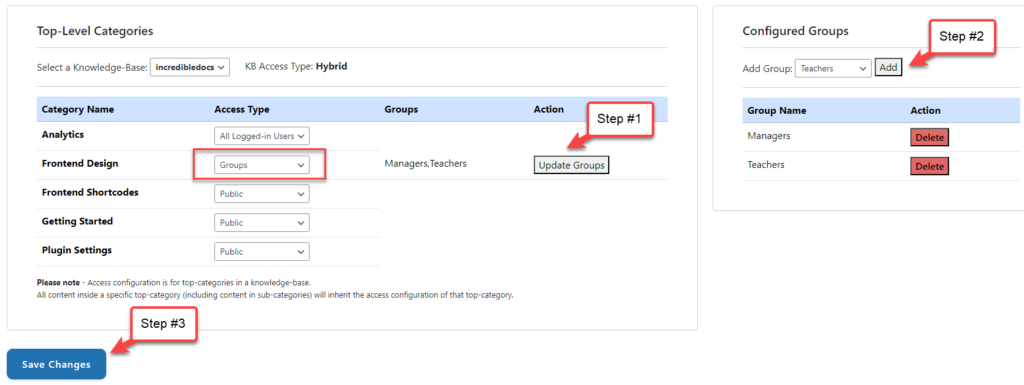
In case the selected access type option is “Groups” for a specific top-level category then click on the “Update Groups” to restrict the access to specific groups of users.
It will pop-up the “Configured Groups” table. You can add a configured group from the drop-down list or delete any group. Finally, click “Save Changes”.
Please note:
> The same group can be used in multiple categories.
> Groups are created using the “Groups” tab and users are allocated to groups using the “Users tab.